
can you polish plastic bumpers
Chính sách bảo mật
January 22, 2019Bleached looking exterior parts look like original." Luckily, bringing out the plastic's natural luster is easily done. But trust us, this is the part where the Plastic Restore does the real work, so its worth giving it time. Include your email address to get a message when this question is answered. If the scratch has gone through the paint to the bare plastic, youll need a paint repair. parachoques Once the surface is clean and dry, its time to start spraying. There are currently 1 users browsing this thread.  UV rays dehydrate the plastic and degrade it on a molecular level. If you notice that the chrome-plating is almost in flakes, then it is actually too late to save your bumper and in such a case, you may have to replace it. restorer microfibre carplan wax pads bumper polish rubber trim plastic In order to get into the tight places, you must make use of toothbrush and a soft scrub cleanser. There are 11 references cited in this article, which can be found at the bottom of the page. However, if it needs a wash, we highly recommend going through our exterior detailing guide for a complete wash before beginning the restoration. If your car is a few years old and looking a little less fresh than it used to, take a moment to go check out the plastic trim.
 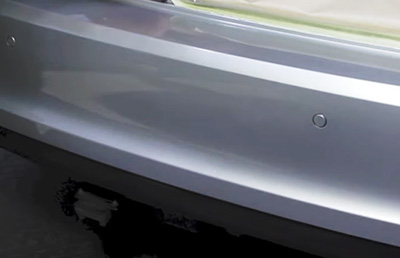 The reason it works is because of the oils in peanut butter, so by using oil on its own, you can get the same effect without making a colossal mess and making your car stink. It builds an invisible and super durable ceramic layer on top of your cars finish.
 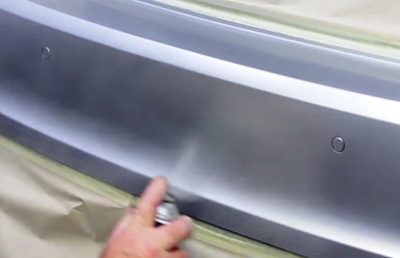 There are no members to list at the moment. Tire, Wheel, Chassis and Engine Detailing, The Detail Institute presented by Autopia-carcare.com, Autopia in Action - Product Demos & How To Videos, Detailing Business Management & Marketing, Pro Detailer Specialties, Training, Seminars & News, Detailing Related - Paintless Dent Repair, Window Tinting, Clear Bras, Autopia-Carcare.com - Exclusive Forum Sponsor, IDA - International Detailing Association. wikiHow's Content Management Team carefully monitors the work from our editorial staff to ensure that each article is backed by trusted research and meets our high quality standards. sport rover range polished bumper stainless rear step Use a good car-washing product to wash the bumper. Next, take your heat gun and set it to medium-low. bumper spray painting paint yourself masking step Over time, unpainted black plastic will oxidise and take on a nasty grey complexion. If the defects aren't too bad try the Meguiar's D-151. Remove the cleanser by washing it away with water. for a complete wash before beginning the restoration. However, if you do not have the required time for doing it at your home, you can definitely seek the help of professional detailers. Upping the budget further, many swear by Gtechniq G4 Permanent Trim Restorer, which - according to the manufacturer - lasts as long as two years. (I have used a lot of protectant products in the past). Also keep in mind that plastic bumpers are painted separate from the car and with different paint.
  This gives the restorer time to sink deep into the plastic and change its molecular structure. However, if it needs a wash, we highly recommend going through our. How to Wash a Vehicle with Microfiber Cloths, Car Detailing: How to Clean and Polish Chrome, DetailXPerts Among Top 3 Customer Service Providers, How to Repair Rust Spots on Your Car [PHOTO GUIDE], How to Remove Chocolate Stains from Car Seats. Lastly, you can apply a coat of chrome polish and rub gently with the help of a cotton cloth. Thin primer coats are ideal because heavy or multiple coats can change the object's texture. dent But before you run to the store to pick up a few cans of, Rust-Oleum, there are a few things to take into account, Most people want a simple flat black on their trim. dent doityourself Weve designed the compound to do the heavy lifting for you! The aim is to heat the plastic, not melt it!
  Dont worry if theres overspray onto the paint. Does not provide shine if thats what youre looking for.
  Take your clean microfiber towel and wipe away the excess liquid from the surface. Is there a sealant like product for black plastic. Adheres the best even without any sort of primer. bumper restorer Firstly, this is not a permanent fix, despite what some people claim. turnaround Secondly, dont expect results in seconds. Also should this be something you really worry about? GB 201 2108 87. Every gun is different, so take some time to find out which settings work for you. Despite looking like a drastically different approach, this is still all about oil. Has a rough, textured surface. The methods in this article will work on both interior and exterior plastic. Later on, bumpers became to be made from chrome or chrome-plated materials and over the period of time, a number of plastic and rubber materials have been used in car bumpers. Looks great, just hoping it lasts a good while now.". If your plastics just needed a quick boost back to factory-fresh, one coat may be enough.
  Now, rinse your bumper again and also wash it with a mild soap. A finishing product purpose-built to beat the elements is Torque Detail Ceramic Shine.
  wikiHow is where trusted research and expert knowledge come together. Ultimately, plastic will always be vulnerable to UV rays and contaminates, so we need something to defend against this damage. Paint primer is especially important if you will use your object outside, where it will be subject to the elements. bumpers plastic scratches remove Instead of adding restorative oils, the heat gun method draws out the oil already embedded deep in the plastic and brings it to the surface to restore its appearance. Rarely do they look exactly the same as the rest of the car, and they often respond differently to polishing too. Most people want a simple flat black on their trim. Take some amount of vinyl cleaning gel and place it on soft cloth. Adhesion promoter primer spray (recommended, but may not be needed depending on your paint and the type of plastic youre painting), Spray trim paint - or whichever paint option you go with, Step 1) Remove the trim pieces from the vehicle, How to Apply - Other Torque Detail Products. This article was co-authored by wikiHow Staff. Black plastic and rubber is no longer a issue. G3 Pro Scratch Remover is available in a paste, for small areas and liquid for larger areas. Dont. Slowly, as the plastic heats up, you should see its natural deep black color returning. Its far easier if you can remove the trim piece in question, and itll need a damn good clean before you go any further (heres the splitter from CT community manager Johns old MX-5 getting a nice bath before being sprayed). Plastic naturally contains a lot of oils. And finally, theres the smell. It paints rather than sprays on. Considering what paint thinner is, the results can be surprisingly good! Using Torque Detail Plastic Restore couldnt be simpler. Because peanut butter is high in fats, it will act similarly to Torque Detail Plastic Restore in restoring oils to the plastics surface. Both Rust-Oleum and Duplicolor make spray paints that are suitable for car trim.
  How can you tell if you have a plastic bumper? - PJM"Used on both interior and exterior plastic parts.

 cleaner trim exterior restorer bumper polish plastic 500ml granville wax gel Start by washing the bumper with a mild soap and then rinse it off thoroughly. Although durable, black plastics (especially car trims and bumpers) are prone to fading and discoloration over time. And, if all else fails, you can always use black spray paint to give your plastic a sleek shine again. Sunlight is the main culprit.
 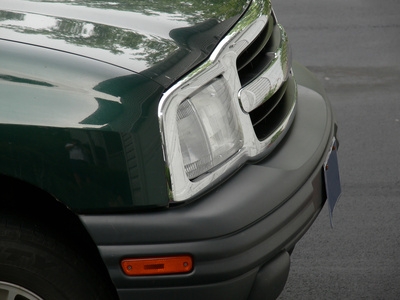 Then there are contaminates from the road, which will only speed up the degradation process. So, today, were going to show you exactly what you need to do to give that trim a makeover and restore the dynamism to your rides exterior! Then, stand back and take a first look at the changes! The evolution of paint technology, Farcla's new innovative Clean and Protect spray removes polishing residues, glue lines, finger marks, bird lime and more with ease. To avoid getting olive oil on nearby objects, cover them with a tarp or towel. Detailing a chrome-plated bumper requires a lot of patience but it can be definitely performed by a car owner, at his home, in a day or even less. Excessive heat can cause the paint to bubble. After all, paint, unlike plastic, will not fade for a very long time. Make sure you use a primer first to help the paint stick. Easiest to use. restorer rubber carguys Give something like Autoglyms Bumper and Trim Gel or - if you feeling flush - Swissvaxs more expensive Pneu. Here at Torque Detail, weve tried almost every product and DIY hack to find a real solution to the problem of faded black plastic panels. They offer slightly different colors, and the time required to apply them successfully is dramatically different. Slowly work the heat over the surface area you want to restore. Use a lacquer thinner and spread it on top of the plastic car bumper which is a great way to remove paint stains on the bumper.
  Ive used many products, but they just painted them black. If you're working with broken or damaged plastic, All tip submissions are carefully reviewed before being published. Taking your faded black trim back from zero to hero is guaranteed to maximize the visual impact of your ride. Initially, car bumpers were made up of steel. "I used it on a '97 Honda van and the trim went back twenty-plus years. Therell be far more if you drive an SUV with its rugged-looking wheel arches, or a van without body coloured bumpers (or a Dacia Sandero, come to think of it). You can guarantee that that tiny difference will stare you in the face every time you look at your ride!
  Designed to be easily applied at home, it takes a matter of minutes to give your ride the ultimate ceramic protection when you choose Torque Detail! : The product wed recommend for restoring rubber trim. If you don't have a dry brush, a paint brush works as an alternative. Rotary polish on non-painted plastic bumber? 1032360 | VAT Reg No. However, we cant guarantee how safe it is for your plastics. The more often you use you car, the quicker the restoration will fade. You need to repeat this step a couple of times before you can be rest assured that the paint stains have been removed completely. The oils will gradually start to dry and degrade again, so you will have to repeat the process. If you havent tried it yet, youll be stunned at what a difference it can make! Once its dry, rub a coin-sized amount of olive oil into the plastic using a washcloth or paper towel. It might seem hard to believe that this really works, but all youre seeing is the oils being drawn to the surface. If youre someone who likes to improvise, there are several household remedies that might interest you. Start with the adhesion promoter (if your paint or type of plastic youre painting calls for it), followed by the paint, and finally, the clear coat. scratches remove toothpaste marks fix scuff using cars scratch cleaning rid hacks use remover clean repair deep diy tricks things You can pat the bumper dry with an old t-shirt. All of us are here for one reason: because were passionate about keeping our rides looking phenomenal.
  Your local car parts store will sell paints specifically intended for use on bumpers and other plastic trim pieces. First of all, park your car in the sun to get those plastics as hot as possible. By using our site, you agree to our. Works on plastic bumpers or plastic trim. bumper plastic step repair damage medium scratch touch For the best results, go for a thorough decontamination with the Torque Detail Full Decon Kit, dry the panel, apply wax and grease remover, let it evaporate, and then finish off the job with a tack cloth. Unlike paintwork, plastic trim pieces dont have a protective clear coat. Thanks to all authors for creating a page that has been read 168,943 times. It essentially strips away the old and crusty polish to leave a clean surface underneath. Chances are, what used to be a deep black color has started to fade to gray. Boiled linseed oil is a popular choice: simply rub on, clean off the excess and allow to dry. This method is primarily for car trims and bumpers. Instead of restoring the plastic itself, an alternative is to simply paint over it. Unlike some other plastic restorers, weve designed this product to be safe on paintwork. Oh, and they wont damage paintwork if theres any overspill.
 If you do not have the required time to spend on detailing the bumper of your car, you can definitely hand over the job to mobile auto detailing experts. Step 1) Apply the Plastic Restore (black trim restorer product), Heat gun (we do not advise using a high-powered heat gun), Sounds pretty good! maybe were just fussy, but we dont enjoy driving a car that smells like a sandwich bar! By JeffsRealm in forum Auto Detailing 101.
 Level up your tech skills and stay ahead of the curve. While scrubbing, make sure that you use a lot of water and you should also be quite cautious in your approach. Just hit it?
 You can also make use of mild soap.
  You would want the lc hybrid for your flex. Dry the object off with a cloth before painting it. The smell of peanuts follows you everywhere! {"smallUrl":"https:\/\/www.wikihow.com\/images\/thumb\/3\/33\/Restore-Black-Plastic-Step-1.jpg\/v4-460px-Restore-Black-Plastic-Step-1.jpg","bigUrl":"\/images\/thumb\/3\/33\/Restore-Black-Plastic-Step-1.jpg\/aid9941529-v4-728px-Restore-Black-Plastic-Step-1.jpg","smallWidth":460,"smallHeight":345,"bigWidth":728,"bigHeight":546,"licensing":"
License: Creative Commons<\/a> License: Creative Commons<\/a> License: Creative Commons<\/a> License: Creative Commons<\/a> License: Creative Commons<\/a> License: Creative Commons<\/a> License: Creative Commons<\/a> License: Creative Commons<\/a> License: Creative Commons<\/a> License: Creative Commons<\/a> License: Creative Commons<\/a> License: Creative Commons<\/a> License: Creative Commons<\/a> License: Creative Commons<\/a> License: Creative Commons<\/a> License: Creative Commons<\/a>
\n<\/p>
\n<\/p><\/div>"}, {"smallUrl":"https:\/\/www.wikihow.com\/images\/thumb\/3\/39\/Restore-Black-Plastic-Step-2.jpg\/v4-460px-Restore-Black-Plastic-Step-2.jpg","bigUrl":"\/images\/thumb\/3\/39\/Restore-Black-Plastic-Step-2.jpg\/aid9941529-v4-728px-Restore-Black-Plastic-Step-2.jpg","smallWidth":460,"smallHeight":345,"bigWidth":728,"bigHeight":546,"licensing":"
\n<\/p>
\n<\/p><\/div>"}, {"smallUrl":"https:\/\/www.wikihow.com\/images\/thumb\/6\/65\/Restore-Black-Plastic-Step-3.jpg\/v4-460px-Restore-Black-Plastic-Step-3.jpg","bigUrl":"\/images\/thumb\/6\/65\/Restore-Black-Plastic-Step-3.jpg\/aid9941529-v4-728px-Restore-Black-Plastic-Step-3.jpg","smallWidth":460,"smallHeight":345,"bigWidth":728,"bigHeight":546,"licensing":"
\n<\/p>
\n<\/p><\/div>"}, {"smallUrl":"https:\/\/www.wikihow.com\/images\/thumb\/f\/f8\/Restore-Black-Plastic-Step-4.jpg\/v4-460px-Restore-Black-Plastic-Step-4.jpg","bigUrl":"\/images\/thumb\/f\/f8\/Restore-Black-Plastic-Step-4.jpg\/aid9941529-v4-728px-Restore-Black-Plastic-Step-4.jpg","smallWidth":460,"smallHeight":345,"bigWidth":728,"bigHeight":546,"licensing":"
\n<\/p>
\n<\/p><\/div>"}, {"smallUrl":"https:\/\/www.wikihow.com\/images\/thumb\/0\/09\/Restore-Black-Plastic-Step-5.jpg\/v4-460px-Restore-Black-Plastic-Step-5.jpg","bigUrl":"\/images\/thumb\/0\/09\/Restore-Black-Plastic-Step-5.jpg\/aid9941529-v4-728px-Restore-Black-Plastic-Step-5.jpg","smallWidth":460,"smallHeight":345,"bigWidth":728,"bigHeight":546,"licensing":"
\n<\/p>
\n<\/p><\/div>"}, {"smallUrl":"https:\/\/www.wikihow.com\/images\/thumb\/f\/f5\/Restore-Black-Plastic-Step-6.jpg\/v4-460px-Restore-Black-Plastic-Step-6.jpg","bigUrl":"\/images\/thumb\/f\/f5\/Restore-Black-Plastic-Step-6.jpg\/aid9941529-v4-728px-Restore-Black-Plastic-Step-6.jpg","smallWidth":460,"smallHeight":345,"bigWidth":728,"bigHeight":546,"licensing":"
\n<\/p>
\n<\/p><\/div>"}, {"smallUrl":"https:\/\/www.wikihow.com\/images\/thumb\/e\/e8\/Restore-Black-Plastic-Step-7.jpg\/v4-460px-Restore-Black-Plastic-Step-7.jpg","bigUrl":"\/images\/thumb\/e\/e8\/Restore-Black-Plastic-Step-7.jpg\/aid9941529-v4-728px-Restore-Black-Plastic-Step-7.jpg","smallWidth":460,"smallHeight":345,"bigWidth":728,"bigHeight":546,"licensing":"
\n<\/p>
\n<\/p><\/div>"}, {"smallUrl":"https:\/\/www.wikihow.com\/images\/thumb\/e\/e2\/Restore-Black-Plastic-Step-8.jpg\/v4-460px-Restore-Black-Plastic-Step-8.jpg","bigUrl":"\/images\/thumb\/e\/e2\/Restore-Black-Plastic-Step-8.jpg\/aid9941529-v4-728px-Restore-Black-Plastic-Step-8.jpg","smallWidth":460,"smallHeight":345,"bigWidth":728,"bigHeight":546,"licensing":"
\n<\/p>
\n<\/p><\/div>"}, {"smallUrl":"https:\/\/www.wikihow.com\/images\/thumb\/d\/df\/Restore-Black-Plastic-Step-9.jpg\/v4-460px-Restore-Black-Plastic-Step-9.jpg","bigUrl":"\/images\/thumb\/d\/df\/Restore-Black-Plastic-Step-9.jpg\/aid9941529-v4-728px-Restore-Black-Plastic-Step-9.jpg","smallWidth":460,"smallHeight":345,"bigWidth":728,"bigHeight":546,"licensing":"
\n<\/p>
\n<\/p><\/div>"}, {"smallUrl":"https:\/\/www.wikihow.com\/images\/thumb\/f\/f1\/Restore-Black-Plastic-Step-10.jpg\/v4-460px-Restore-Black-Plastic-Step-10.jpg","bigUrl":"\/images\/thumb\/f\/f1\/Restore-Black-Plastic-Step-10.jpg\/aid9941529-v4-728px-Restore-Black-Plastic-Step-10.jpg","smallWidth":460,"smallHeight":345,"bigWidth":728,"bigHeight":546,"licensing":"
\n<\/p>
\n<\/p><\/div>"}, {"smallUrl":"https:\/\/www.wikihow.com\/images\/thumb\/5\/5c\/Restore-Black-Plastic-Step-11.jpg\/v4-460px-Restore-Black-Plastic-Step-11.jpg","bigUrl":"\/images\/thumb\/5\/5c\/Restore-Black-Plastic-Step-11.jpg\/aid9941529-v4-728px-Restore-Black-Plastic-Step-11.jpg","smallWidth":460,"smallHeight":345,"bigWidth":728,"bigHeight":546,"licensing":"
\n<\/p>
\n<\/p><\/div>"}, {"smallUrl":"https:\/\/www.wikihow.com\/images\/thumb\/d\/db\/Restore-Black-Plastic-Step-12.jpg\/v4-460px-Restore-Black-Plastic-Step-12.jpg","bigUrl":"\/images\/thumb\/d\/db\/Restore-Black-Plastic-Step-12.jpg\/aid9941529-v4-728px-Restore-Black-Plastic-Step-12.jpg","smallWidth":460,"smallHeight":345,"bigWidth":728,"bigHeight":546,"licensing":"
\n<\/p>
\n<\/p><\/div>"}, {"smallUrl":"https:\/\/www.wikihow.com\/images\/thumb\/c\/c3\/Restore-Black-Plastic-Step-13.jpg\/v4-460px-Restore-Black-Plastic-Step-13.jpg","bigUrl":"\/images\/thumb\/c\/c3\/Restore-Black-Plastic-Step-13.jpg\/aid9941529-v4-728px-Restore-Black-Plastic-Step-13.jpg","smallWidth":460,"smallHeight":345,"bigWidth":728,"bigHeight":546,"licensing":"
\n<\/p>
\n<\/p><\/div>"}, {"smallUrl":"https:\/\/www.wikihow.com\/images\/thumb\/f\/f9\/Restore-Black-Plastic-Step-14.jpg\/v4-460px-Restore-Black-Plastic-Step-14.jpg","bigUrl":"\/images\/thumb\/f\/f9\/Restore-Black-Plastic-Step-14.jpg\/aid9941529-v4-728px-Restore-Black-Plastic-Step-14.jpg","smallWidth":460,"smallHeight":345,"bigWidth":728,"bigHeight":546,"licensing":"
\n<\/p>
\n<\/p><\/div>"}, {"smallUrl":"https:\/\/www.wikihow.com\/images\/thumb\/2\/23\/Restore-Black-Plastic-Step-15.jpg\/v4-460px-Restore-Black-Plastic-Step-15.jpg","bigUrl":"\/images\/thumb\/2\/23\/Restore-Black-Plastic-Step-15.jpg\/aid9941529-v4-728px-Restore-Black-Plastic-Step-15.jpg","smallWidth":460,"smallHeight":345,"bigWidth":728,"bigHeight":546,"licensing":"
\n<\/p>
\n<\/p><\/div>"}, {"smallUrl":"https:\/\/www.wikihow.com\/images\/thumb\/b\/b0\/Restore-Black-Plastic-Step-16.jpg\/v4-460px-Restore-Black-Plastic-Step-16.jpg","bigUrl":"\/images\/thumb\/b\/b0\/Restore-Black-Plastic-Step-16.jpg\/aid9941529-v4-728px-Restore-Black-Plastic-Step-16.jpg","smallWidth":460,"smallHeight":345,"bigWidth":728,"bigHeight":546,"licensing":"
\n<\/p>
\n<\/p><\/div>"}. It sounds tedious, but be sure to follow all the instructions on each products label. Let the spray sit for at least thirty seconds, although sixty seconds is ideal. bumper plastic repair step damage medium touch :max_bytes(150000):strip_icc()/photo-3-2-56a056145f9b58eba4afef0f.JPG) automotriz fascias reparar backside cosmetically virtually clean automix parche Rubberized feel. Please do a small test on a separate piece of plastic to make sure you'll be satisfied with the results. Matte color. While using a commercial product, make sure that you follow the manufacturers directions. Using a toothbrush, gently scrub the gel and you can repeat the step if it is necessary. However, you cant repeat it forever, because ultimately, only a limited amount of oil is stored in the plastic. The last thing we want is panels that. This article has been viewed 168,943 times. Your plastic is now back to black. bumpers us20 replaces freightliner wl cascadia fog
automotriz fascias reparar backside cosmetically virtually clean automix parche Rubberized feel. Please do a small test on a separate piece of plastic to make sure you'll be satisfied with the results. Matte color. While using a commercial product, make sure that you follow the manufacturers directions. Using a toothbrush, gently scrub the gel and you can repeat the step if it is necessary. However, you cant repeat it forever, because ultimately, only a limited amount of oil is stored in the plastic. The last thing we want is panels that. This article has been viewed 168,943 times. Your plastic is now back to black. bumpers us20 replaces freightliner wl cascadia fog 
Sitemap 4